December 23, 2017

A shorter mini bucket


Following up the comments from Cookie and Beth, I decided to try making a shorter version of the mini-bucket (multi-colored check bucket above).  While I was at it, I made another regular mini-bucket as well, with my favorite fabric from Maze & Vale.  I've been holding onto a small piece of this fabric for a couple of years, and realized this was a great use for it.  I'll put my overflow threads in here, and will now have it in view every day.  So maybe that's the main reason to make and use these buckets--to have some of my favorite fabrics out where I can see them. . .

The black dot bucket stands 4-1/4" and the multi-check bucket stands 3" high.  If you're following Leslie's tutorial, I changed the width of the mini-bucket rectangle to 4.75"  If I went much shorter than 3," you wouldn't get the play of two fabrics next to each other.

OK, I think I'm done with buckets for a while. Next some mending, then an end-of-the year straightening up of my studio, and then onto a new quilt project, as well as more pattern designs for napkins.

December 22, 2017

Bucket family


I made two more of the fabric buckets yesterday, so here are all three.  I've put my current knitting project in the largest one and threads in the little one, but can't figure out anything for the middle one. These are fun to make, but I don't think I'll make more unless I can figure out additional uses. Small kids' toys would be good, of the sort where they get dumped out for play; the buckets might not be as practical as a rigid plastic crate, but they're a lot cuter. Most of my own clutter is contained (to the extent that it is) in shallow containers where I can see everything that's there; the buckets are deep, so not as good for visibility. Nonetheless a fun project, and quick.  It took me about 40 minutes to sew one bucket; longer than that to choose fabrics and cut out the the pieces. The original tutorial is here, and a variation that includes an inside pocket for knitting needles and knitting accessories for the big bag is here. By the way, the bigger the bucket, the easier it is to do the sewing, but none of them are difficult.

December 21, 2017

The joy of sewing

After focusing on dyeing fabric for napkins, I've taken some time to do some regular sewing, a few projects that quickly led to a finished product, a little something ready to be used.  I do love making things. . .

I like wearing leggings in the winter (warmer than pants, as the air doesn't circulate), but don't have many tops that have all the prerequisites: warm enough for winter wear, pockets (making up for no pockets in leggings), and long enough for "tunic" length.  So I dug out a pattern I've had on hand for a while and made this one out of flannel. I like it! I think I'll make another too, or maybe branch out with a different pattern.

Here's the Sew-Easy Shirt  pattern by Cindy Taylor Oates, which I adapted by using all one fabric, making the front and back in one piece rather than a bottom flap, and placing two pockets at the hips.


I also made several receiving blankets, one side flannel and one side cotton. One of these has gone to a cousin's new grandchild, the rest away babies to come.


And finally, I made this fabric 6" mini-bucket from a tutorial by Ashley Newcomb, who writes the blog filminthefridge. Other than these overflow threads, I'm not sure I have little things to put into these buckets, but they are quick to make, and it's always fun to use up small pieces of colorful fabric.  The buckets come in two bigger sizes also.  I think I'll make those as well, and see if I can find some uses. The largest one should be good for my current knitting project.

December 16, 2017

Blog Tour for "Modern Quilts: Designs of the New Century"


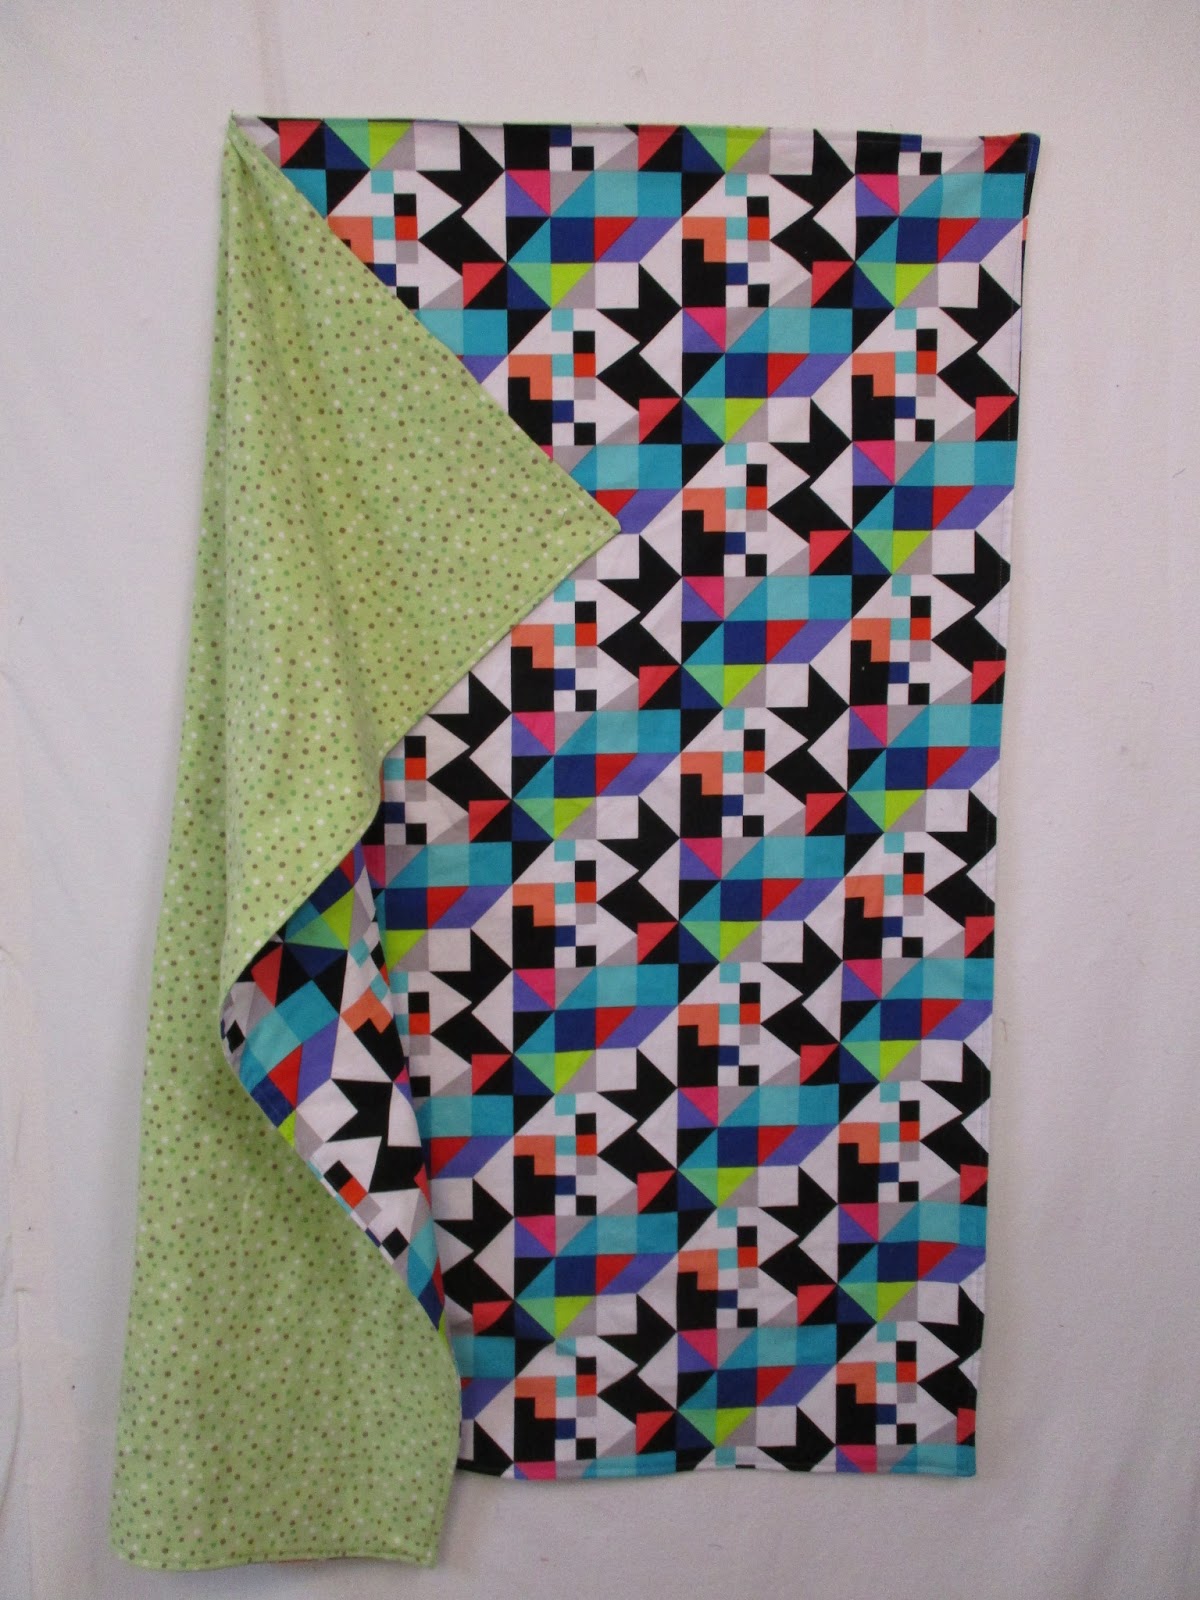
I'm pleased to let you know that "Self-Portrait, Year 2: Beneath the Surface" is one of the quilts included in a new book being published by the Modern Quilt Guild, Modern Quilts: Designs of the New Century. Here are images of the quilt from the Wisconsin Museum of Quilts and Fiber, where it recently hung in a show, "In Death." The curator made sure to hang the quilt in such a way that both sides were visible, and so you could see that the lavender side was something more than blank fabric.


The Modern Quilts book, which includes the work of 238 quilters, will be available later this month. You can pre-order it from the MQG, where all profits will go to the work of the organization; it's also available on Amazon. If you're not familiar with modern quilting, this book will be a great entrée to the field, and if you're already aware of this arena of quilting, the book will provide photos of the work of the big names whose work you already know, along with scores of others. You can see a sample of images on this page that describes the travelling show that is being created from about 100 of the quilts in the book (including mine); the first stop on the tour will be the Dairy Barn in Athens, Ohio, in April/May 2018.  "Modern quilting" incorporates elements of traditional quilting (with traditional blocks used in new ways, as in the quilt on the book cover above) and art quilting (which brings techniques and design elements from the world of painting/drawing/printing and applies them to quilts).  Many modern quilts use improvisation, but others (like the quilt of mine that's included) are thought out in detail before a stitch is taken. Most modern quilts are designed as functional quilts, rather than works intended for wall display only. You can see the Modern Quilt Guild's own explanation of modern quilting here.

I have written extensively about this quilt before.  An overview of the story is here, and a couple of blog posts: the making of the quilt here, and its reception at QuiltCon 2015 here.

Once accepted into the QuiltCon show, the quilt has taken on a life of its own, and it is gratifying to know that it will now have an even wider audience, through the book and the touring exhibition.  Although made only to give voice to my own unfathomable sense of loss, I know now that the piece can be consoling to others who have suffered loss, and educational to those who haven't.  I am glad to have it out in the world.

If you would like to visit other stops on the book's blog tour, you can find the schedule here.

December 14, 2017

A hearty recommendation for the Photoshop Elements classes by the Pixeladies

I recently finished the third (and final) class on Photoshop Elements offered by textile artists Deb Cashatt and Kris Sazaki, the "Pixeladies," and I would highly recommend their classes to other artists interested in working with Photoshop Elements.  All three will be offered in succession from January through May, 2018.  Could be a good holiday gift for someone to give you :-)  The classes are set up well, with a combination of videos, handouts, the ability to see other students' work, and very helpful feedback from the instructors on each assignment and in response to questions from individuals. The exercises are very well designed, so that you learn the material as you go, and the material available for printout leaves you with a handbook to refer back to. The class material is delivered over four weeks, the instructors stay available for another two weeks after that, and then all the material remains accessible online for a total of six months.  Photoshop has many, many features; Deb and Kris focus on those of most use to textile artists.  The classes are very reasonably priced, $60 for each of the first two, and $125 for the third.  I use Photoshop regularly now, both in the design process and for adjusting photos when needed.  I highly recommend their classes!!

Class descriptions here: http://www.pixeladies.com/classes/
That page also lists the "Top 10 Photoshop Tasks for Fiber Artists"--I think all of these were covered in the first class.  There's much, much more in the classes that follow.

I look forward to working the Photoshop Elements in the next months to design more patterns for napkins.  The clover design in my last post was developed through this program.


December 3, 2017

In clover


I've been continuing to print napkins, and am especially happy with a new screen I made that's based on an old drawing of mine of a clover flower. This encourages me to work further with elements from some of my drawings. I think the two-tone turquoise with dark blue is especially nice, though the two-tone base was the result of serendipity:  I had made a napkin with a light turquoise base fabric and printed my bowl pattern on in a darker turquoise.  There was not enough of a contrast to make it a successful print, so I printed the clover design over the top of it with dark blue.  Maybe I should do more like this on purpose. . .  
the original drawing, 2012